Playing: Sprue Posse RTT 2/20 Results

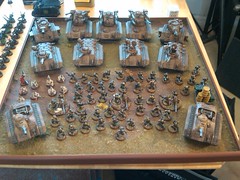
The Sprue Posse open was a success. 11 competitive gamers came out for a shot at the $150 prize pool. They battled with 1500 point armies through 3 rounds of swiss playing seize ground, capture and control and annihilation missions.

Special thanks to Aero Hobbies and Games for making this event possible.

Final Standings


Tiebreakers


Rank Player Score Wins Bucholz Progressive Berger


1 Jonathan Moss 2.5 2 5.5 5 4.25
2 Patrick Burdine 2.5 2 5 5 4.25
3 Ryan Conversano 2 1 3.5 3.5 2.75
4 John Mann 1.5 1 6 3.5 2.5
5 Jarod Khoury 1.5 1 4.5 4 1.75
6 Josh Gianunzio 1.5 1 4 2.5 1.5
7 Hector Miranda 1.5 1 3 3.5 1.75
8 Shawn Hausmann 1.5 0 5.5 2.5 0.75
9 Anthony Wang 1.5 0 5 4 0.75
10 Todd Carrigan 0 0 5 1.5 1.75
11 Olivier Curiel 0 0 4.5 1

Army Lists Below:

The winners:

First Place

Jonathan Moss - Tau


HQ
Shas’el Plasma Rifle, Missile Pod, Multi Tracker
Shas’el (Plasma Rifle, Missile Pod Multi Tracker)
+ 2 Bodyguards (Flamer, Plasma Rifle, Multi Tracker)

Troop

Firewarriors x6 w Devilfish

Elite

Stealth Suits x 3 (Team Leader) 2 DC, 1 Burst Cannon, Drone x2
Crisis Suits x2 (TLMP Flamer)

Fast

Piranhas x2 (Fusion Blasters)

Heavy

HammerHead (Railgun, Multi Tracker, Disruption Pod, Target Lock, Burst Cannon x2)

Second Place

Patrick Burdine - Chaos Daemons

HQ

Herald of Khorne – (Juggernaut, Might, Fury)
Great Unclean one – (Cloud of Flies)

Troops

Plaguebearers x 7 w Icon
Plaguebearers x 7
Plaguebearers x 7
Bloodletters x 8

Elite

Bloodcrushers x 4 (Icon, Instrument, Fury)

Heavy

Daemon Prince (Mark of Nurgle, Wings, Iron Hide, Noxious Touch, Flies)
Soul Grinder Phlegm
Soul Grinder Phlegm

Third Place

Ryan Conversano - Black Templars

HQ

Emperor’s Champion (Accept any challenge no matter the odds)
Marshall (Lightning Claws, Bike)

Troops

Crusader Squad, BP and CCW, Power Fist x1, Melta x1, Frag Grenades w Rhino (Extra Armor, Smoke)
Crusader Squad, Bolters, Plasma x1, Lascannon x1, Frag Grenades w Rhino (Extra Armor, Smoke)

Elite

Venerable Dreadnaught w Heavy Flamer, Twin Lascannon, EA, Smoke w Drop Pod

Heavy

Predator Annihilator (TL Lascannon, Heavy Bolter Sponsons, Extra Armor, Smoke)
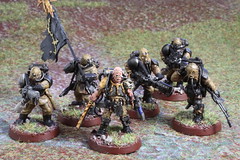
Best Painted

Shawn Hausmann – Orks

HQ

Warboss PK KS Cybork BP Heavy Armor
Big Mek PK KFF Cybork Heavy Armor Bosspole

Troops

Nobz x 10 – Painboy, Cybork, 3 Big Choppa, 2 Kombi Skorcha, 3 BP, 4 PK, Banner, Heavy Armor
w Battlewagon Red Paint Big Shoota Deffrolla Plank
Boyz x 12 – Nob PK BP Trukk Ram Plank RP, Eavy Armor

Fast

Deffkopta TL Rockitt PK

Elite

Burna Boyz x14

Heavy

Battlewagon Red Paint Kannon Deffrolla Plank

Remaining Lists:

Todd Carrigan – Space Wolves

HQ

Wolf Lord w TWM 2 Wolves SS
Runepriest COS Murderous Hurricane and Living Lightning

Troops

Grey Hunters x 10 Plasma x2 Rhino
Grey Hunters x 10 Flamer and Melta Rhino

Elite

Dreadnaught Plasma Cannon
Lone Wolf Terminator Armor CFSS + 2 Wolves

Heavy

Long Fangs x 6 4 Missiles 1 LC w Razorback (TL LC and Stormbolter)
Long Fangs x 6 4 Missiles 1 LC
Predator (Autocannon and Heavybolter)

Olivier Curiel – Imperial Guard

HQ

CCS (Carapace, Standard, Vox)
Lord Commissar (Carapace, Melta Bombs, Plasma Pistol)
Tech Priest w 2 Servitors (Heavy Bolters)

Troops

PCS – (Plasma, Vox, Power Fist)
Commissar (Power Weapon)
Infantry x 10 w Vox
Infantry x 10 w Vox
Infantry x 10 w Vox
Infantry x 10 w Vox
HWS (Heavy Bolters)

Heavy

LR Demolisher w Lascannoon HB Sponsons EA Pintle Heavy Stubber
LRBT w Lascannoon HB Sponsons EA Pintle Heavy Stubber

Josh Gianunzio – Tau

HQ

Shas’o Plasma Rifle CIB Shield Gen HWMT
Shas’el TL Plasma Rifle MP HWMT

Troops

6 x Firewarriors w Devilfish DP MT SMS TA

Elite

Crisis Suits x 2 TLMP BSF / TL
Stealth x 5 Leader Bonded Fusion

Fast

Piranha x 2 Fusion Targeting Array

Heavy

Hammerhead RG Burst MT OP

Jarod Koury – Chaos Daemons

HQ

Fateweaver
Herald Tzentch / Chariot Master Sorc and Bolt of Tzeentch x 2

Elite

Flamers of Tzeentch x5 w Bolt
Bloodcrushers x 3

Troops

Horrors x 7 Bolt
Horrors x 7 Bolt / Icon

John Mann – Imperial Guard

HQ

CCs Melta x4 w Chimera

Troops

PCS Flamer x4 w Chimera HF
Infantry Squad w AC Team and Commissar
Infantry Squad w AC Team
Veteran Squad Plasma x3, Lascannon w Chimera HB

Fast

Vendetta TL Lascannon x3
Banewolf

Heavy

Manticore
Leman Russ Executioner HF

Hector Miranda – Black Templars

HQ

Emperor’s Champion (Accept any challenge no matter the odds)
Marshall w Combi Melta, Power Weapon, Iron Halo

Troops

Crusader Squad x 10 w 2 Neophytes (Power Fist, Melta) Drop Pod
Crusader Squad x 10 w 2 Neophytes (Power Fist, Plasma) Drop Pod
Crusader Squad x 10 w 2 Neophytes (Power Fist, Flamer) Drop Pod

Elite

Venerable Dreadnaught (Assault Cannon, Power Fist) Drop Pod
Dreadnaught (Assault Cannon, Heavy Flamer, Power Fist) Drop Pod

Anthony Wang – Chaos Space Marines

HQ

1 Daemon Prince (Wings; Mark of Nurgle; Close Combat Weapon; Fearless; Warptime x1)
1 Daemon Prince (Wings; Mark of Nurgle; Close Combat Weapon; Fearless; Nurgle’s Rot x1)

Troops

5 Plague Marines Champion Melta x2 Power Fist Rhino
5 Plague Marines Plasma x2 Power Fist Rhino

Elite

3 Terminators (Terminator Armour; Power Weapon x3; Combi-melta x3)

Heavy

2 Obliterators
2 Obliterators
2 Obliterators

Playing: The Everchanging List

It's only been a day since I posted my tentative list for Slaughter in Space 2 and I have already thought of more changes. After speaking with Shep about my list, he convinced me to run a Daemonhunter Inquisitor with Emperor's Tarot, Psychic Hood, 2 Hierophants, and 2 Mystics. This would give me a potential +1 to my "who picks sides and goes first" roll, a full table psychic hood, leadership 10, and deep strike protection, all for the low cost of 83 points. I was really hoping not to cross into the "allies" aspect of Imperial Guard, but in an effort to keep a competitive edge, I almost feel I need to pursue this new build element.

2000 Pts - Vraksian Renegades (Count as Imperial Guard)

HQ:

Company Command Squad (Meltagun x4; Astropath; Officer of the Fleet; Chimera (w/ Heavy Flamer))

Elite:

Inquisitor (Emperor's Tarot, Psychic Hood, Hierophant x2, Mystic x2)

Troops:

Platoon Command Squad (Flamer x4; Chimera (w/ Heavy Flamer))
Infantry Squad (Flamer x1; Chimera (w/ Heavy Flamer))
Infantry Squad (Flamer x1; Commissar)
Heavy Weapons Squad (Autocannon x3)
Veteran Squad (Demolition Charge; Melta Bombs; Meltagun x3; Demolitions; Chimera (w/ Heavy Flamer))

Fast Attack:

Vendetta Gunship
Vendetta Gunship
Valkyrie

Heavy Support:

Hydra Flak Tank Battery (Hydra Flak Tank x3)
Manticore Rocket Launcher (w/ Heavy Flamer)

This gives my list the option of running the stubborn 31 man blob or deploying as 3 different squads when needed for some missions. I lost some flamers and a veteran squad with meltas, which I am concerned about. I would have also liked to fit some plasma guns into this list, so I will have to think more on that.

I know that this is not the final list, but it gives me more to think about.

For fluff, I am thinking of having the inquisitor be my rendition of Cardinal Xaphan.

Playing: Preparing for Slaughter in Space 2

In preparation for Slaughter in Space 2, I have decided to continue to extend and play my Vraksian Renegade Army, counts as Imperial Guard. Learning from my experience at Broadside Bash 2010, I will be taking what I feel is a highly competitive list. My final draft, pending the release of the missions to be used, is as follows:

2000 Pts - Vraksian Renegades (Count as Imperial Guard)

HQ:

Company Command Squad (Meltagun x4; Astropath; Officer of the Fleet; Chimera (w/ Heavy Flamer))

Troops:

Platoon Command Squad (Flamer x4; Chimera (w/ Heavy Flamer))
Infantry Squad (Flamer x1; Chimera (w/ Heavy Flamer))
Heavy Weapons Squad (Autocannon x3)
Special Weapons Squad (Flamer x3)
Veteran Squad (Demolition Charge; Melta Bombs; Meltagun x3; Demolitions)
Veteran Squad (Meltagun x3; Chimera (w/ Heavy Flamer)

Fast Attack:

Vendetta Gunship
Vendetta Gunship
Valkyrie

Heavy Support:

Hydra Flak Tank Battery (Hydra Flak Tank x3)
Manticore Rocket Launcher (w/ Heavy Flamer)

Now that the tentative list is set, I need to paint 1 Chimera, 2 Vendettas, 2 Manticores, and about 5 Guardsmen with Flamers.

Playing: Rule Disputes at Tournaments

While at the Broadside Bash 2010, I had a very poor experience with one opponent, that seemed to not know the rules. This lack of knowledge, combined with his own persistence that he did know the rules frustrated me to the point that I pretty much conceded the game. I know that I also have rules issues, at times, as did some of my other opponents. However, the one opponent was very abrasive and unwilling to accept they were wrong. As a result of this, I went back and made sure I refreshed my own knowledge of some rules, since I will sometimes forget or misplay a specific rules. As such, here is a list of questions that came up during the tournament.

Q: Do vehicles benefit from cover if the vehicle is more than 50% obscured, but the facing of the vehicle being targeted is not 50% obscured?

A: No, "at least 50% of the facing of the vehicle that is being targeted needs to be hidden by intervening terrain or models from the point of view of the firer for the vehicle to claim to be in cover." (page 62, BRB)

Q: Do vehicles benefit from cover if the vehicle is behind area terrain.

A: While this rule may be arguable, the intent is clearly no, "Vehicles are not obscured simply for being inside area terrain. The 50% rule given above takes precedence." (page 62, BRB) While this does not specifically state that it includes vehicles behind area terrain, the intent is clear. The reason I indicate this is clear is because the question above already addresses the impacts of obscurement, and that vehicles need 50% of their facing to be hidden by intervening terrain, regardless of the type of terrain. Obviously, if the vehicle is in range of a Kustom Force Field or other piece of war gear that provides cover, then that cover applies.

Q: Once a vehicle has been assaulted, if a unit still has models in base to base contact with a vehicle in its assault phase on successive turns, can it attack it again?

A: Yes, "units that still have models in base contact with a vehicle in its assault phase may attack it again, just as in a normal ongoing combat (including all models that would count as engaged in a normal assault)." (page 63, BRB) This is actually an example of a rule that I was unaware of, just a demonstration that I am not perfect either.

Q: If a unit has gone to ground as the result of a failed pinning test and has also taken 25% casualties, does it still need to take a morale check for casualties at the end of the shooting phase?

A: Yes, "whilst [a unit] has gone to ground the unit may do nothing of its own volition, but will react normally if affected by enemy actions (for example, it will take morale tests as normal). If the unit has to fall back, it will return to normal immediately." (page 24, sidebar, BRB)

So the above included all of the major rule disputes I had during the tournament. I definitely had one of them wrong and I encourage all tournament players to evaluate any rule disputes after their games to improve their own knowledge and performance in their future games.

Playing: Chaos Space Marine Tactics

Some basic tips on playing Chaos Space Marines

Tip #1: Know Thy Enemy

A huge aspect of deployment is knowing what the enemy capabilities are. In the current world, plasma guns and melta guns in abundance and are the bane of Plague Marines and Obliterators. If facing an opponent that has any significant number of these, deploy in cover and deploy your Rhinos near cover, such that if you need to bail you have other cover options that just the Rhino itself. I mentioned plasma guns and melta guns above, but Lascannons and Missile Launchers also apply. Learning about the other armies can take some time and I have adopted the policy of asking a few basic questions to my opponents, a) what units have ap 2 or ap 1?, b) what units have ap 3?, c) do you have any large or small blasts and what are their strength and ap values? This will help you learn what armies use ap2 or lower and which ones use ap3, and which ones got the short end of the stick.

Tip #2: Know Your Limitations

Daemon Princes (DP) are great, arguably the best HQ option in the CSM Codex. However, exposing the DP to significant volume of fire or the assault of a horde unit makes for their early demise. If the enemy has significant fire power, you need to be careful about having your DP out in the open. An ideal situation is to get your DP into an assault that you will win, but not win until their assault phase, so you can avoid being a fire target out in the open. This is definitely challenging and requires knowing the mathhammer and trusting the dice to fall properly. Unless your opponent is inexperienced or makes a bad play, this ideal scenario will be hard to achieve. Therefore, you will need to try to force the situation through timing, distance, and effective movement. Don't rush out turn 1, b-lining it for the nearest target, if it will leave you exposed to a high-level of fire. Furthermore, don't expose yourself to a charge from or into a large unit of "Boyz" or their equivalents, you can sometimes handle about 12-16, but more than that and you will either be looking at a tarpit or at a "hidden fist" that's just going to kill your DP after a round or two. Look to thin these units out before engaging.

Also know the limitation of your plague marines. Their choppy, fnp, blight grenade, t5 goodness can surprise the opponent that is too used to fighting space marines, but they are also initiative 3 and higher initiative power weapons (i.e. blood letters) will crumble them fast. As indicated above, this is also where plasma guns, melta guns, missle launchers, and lascannons turn your plague marines into I3 Chaos Space Marines, that are 8 points more expensive each. A good shot with a S8 AP3 Battle Cannon may spell doom for your plague marines if not in a vehicle or in cover. Most of what I said in this paragraph also applies to Obliterators, since you can only put so much faith in a 5+ invuln save, and S8 will make your 2 wounds useless.

Tip #3: Always Think Twice about Deep Striking

For Deamon Prince with Wings, don't bother even thinking about it. There may be the rare situation when this may work, but more often than not it will just leave your DP out in the open, with nothing to shoot and unable to assault. Without the ability to come in off an icon, you won't be able to confidently get get the position you need to make it worthwhile.

Obliterators will sometimes have viable Deep Strike opportunities, but you typically won't be playing with a lot of units and you may just be taking the choice of fire out of the opponents hands early game. As many experience, without the Oblit threat on the board the target decisions for then enemy become easy, DP and Plague Marines, potentially in that order. With Oblits on the board, it makes the decision process more complicated. That said, you might be playing a AV 14 spam list and you need those multi-meltas and meltas to get those close shots. Even then, think twice about it. Reserve rolls have this knack for not coming up when you need them and then its turn 4 or 5 and its just too late. Calling back to knowing your enemy, be careful where you deep strike, 225 points is too much for a suicide squad, so having a bunched up group is a tasty morsel for those plasma cannons, melta cannons, melta spam squads, double tap plasma guns, etc. If you are looking at units for deep striking melta, think more along the lines of termicide units, 3 Chaos Terminators with Combi-Meltas, but not in exchange for Oblits. If you went with AC/Las Predators, Termicide units might be something you want to consider to fill the DS melta role.

Tip #4: Creating Angles

Don't give your opponent the easy position and facing options. When deploying and moving, keep enough space between various units such that the opponent can only face one group of units at a time. This doesn't mean spreading out your entire army, since you need to support your own units (see below in Tip #5: Support Units), but in some cases you want to slightly split your force. Specifically looking at Obliterators, think of ways to generate side shots by force the opponent to face one of your units while having the other unit at a distance and angle that now has a good shot.

Tip #5: Support Units

This isn't a specific unit so much as making sure your units can support each other during the course of the game, this can mean screening your Oblits with Plague Marines or setting up counter assault opportunities with your Daemon Prince. Employ a "battle buddy" system. Main point here is don't leave your buddy out to dry, yes I know you're Chaos, but if you fight alone you die alone, this includes your Daemon Prince.

Tip #6: Herding

This is an extension of creating angles. Now that you have these angles, start to create pressure by closing the distance, when appropriate. This advice will not always apply, but when going for far objectives or trying to slow down armies that are faster than you, you may need to herd the opponent into corners and cut off their mobility, moving towards their objectives and preventing them from getting yours. Understand that there is only so much you can do against Eldar and Dark Eldar (or other fast skimmers), but do what you can to not just give them that late game boost onto objectives.